BOM – January – French Braid Star!
So I have never done anything like this before – but hey that has never stopped me before!
Taking from our Rainbow Swaps group on Facebook https://www.facebook.com/groups/149803875155388/ I have a bunch of 5″ charm squares in some wonderful rainbow colours.. the test was to make a nice block… (well one a month) using some of those wonderful fabrics. We also did a number of width of fabric swaps so they may find their way into a block as well!!
So I started with Google Images and chanced upon a French Braid pattern that someone had turned into a star…. and thus this tutorial came about.
I used a different colour for each of the points but in hindsight I think that this would look AMAZING if the strips were all cut.. then tossed about and selected at random to be out together… I can’t help but think of Amy’s children messing up her wonderful fabric bundles when I think of this… maybe we could all borrow out little ones to do the randomizing for us!!
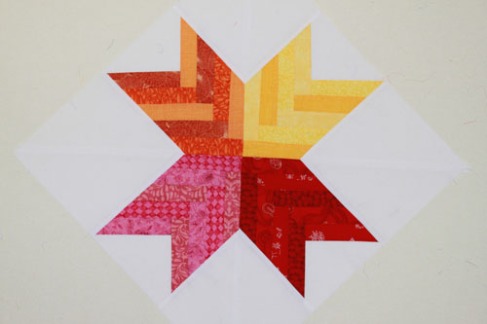
So to give you an idea here is what the block will look like. The block is 19″ square.
It was really quite easy. If I miss anything along the way or you find something confusing please let me know so that I can adjust the instructions.
Materials
What you will need: (this is for each star – so 4 corners)
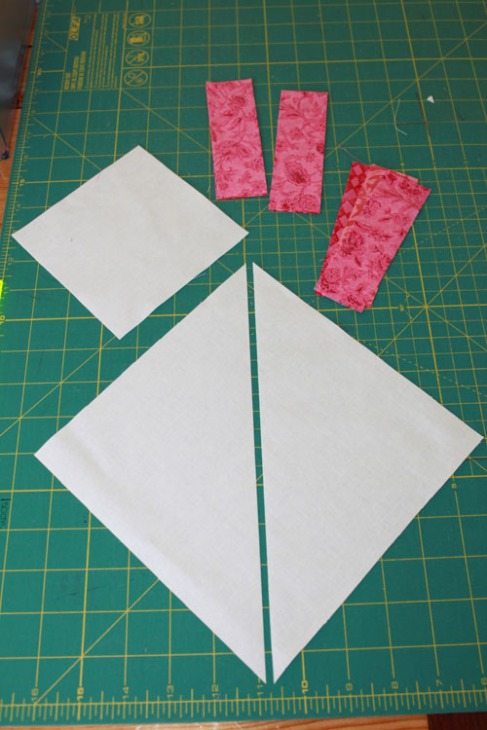
- Four 5″ White squares
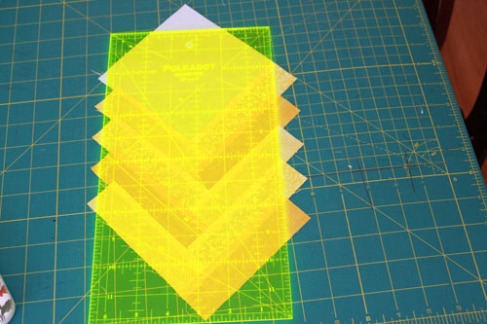
- Four 8″ White Squares (cut diagonally in half – see picture)
- three 5″ squares of each colour.. so in my example – 3 red, 3 yellow, 3 pink and 3 orange. These you will cut into three sets of 1.5″ x 5″ strips. So alternatively you will need nine strips that are 1.5″ x 5″ per corner –
3236 all up if you are just using scrap. (thank you Mimi!)
Instructions
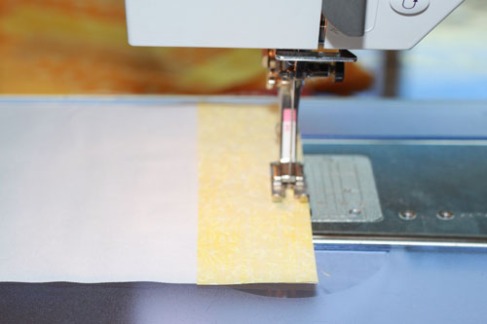
Take the 5″ square and stitch one of the colour strips to one side.
Then you take a second strip of a different fabric and add it to the next side – this makes the first point.
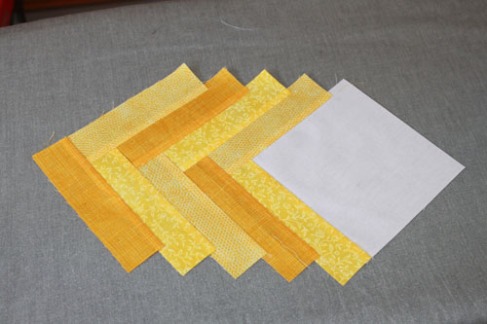
You then take the third fabric and add it to the first side. You ALWAYS add fabric so that it is square on the POINT end. The outside will step down.
By using three fabrics two the same will never be touching each other, of course this is irrelevant if you a are going with a scrappy look!
Ok so once you have added the 9 strips it will look like this
From here we need to trim off the steps from the side. Line your ruler up with the point where the colour and white square meet and the inside points of the steps like so:
Trim. Turn your block around and line up the freshly trimmed block with the 6″ line on your ruler.. again like so:
and trim.. Next we will square off the white to make a neat end.
From the point of your colour it will be 10″ to the cut off point. Make sure you line up your ruler with your fresh cut sides and make the block as square as possible.
Using the 45 degree angle line on your mat check that there hasn’t been stretching in your fabric and trim (scarcely) to make the point even.
Flip your block over and repeat if necessary.
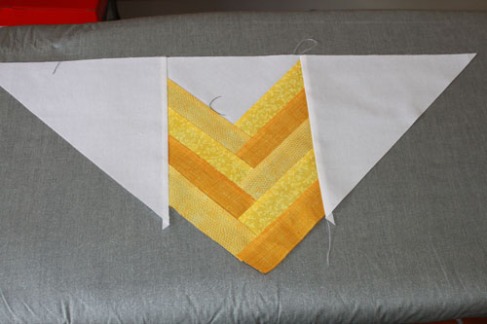
Now we need to add the sides to the braid to make the block. Using your 8″ triangles line the flat side of your braid with one of the short sides of the triangle. Take care NOT to stretch the fabric at this stage. NOTE: the triangles are bigger than needed to allow you to trim back – as we are using fabric cut on the bias I find it easier to trim.
Stitching on the right side
Both sides attached showing the excess.
Line up and trim – take care.
trim the second side. (one side will have more to trim off than the other)
The first quarter COMPLETE. Make the second quarter the will be DIRECTLY OPPOSITE this one exactly the same. To ensure that all 4 fit you MUST turn the remaining two in the opposite direction when adding the second colour fabric. what do I mean?
When adding fabric to the white square add the first strip. When adding the SECOND strip turn your square clockwise for blocks 1 & 3. For blocks 2 & 4 add the first strip then when adding the SECOND strip turn you block ANTI-Clockwise. You MUST do this otherwise the centre of the star wont meet.
Sew the other three corners.
Join the top two blocks together from the CENTRE outwards. Take care that your points meet.
Repeat for the bottom two.
Sew your two halves together.
DONE!
This block will be 19″ square.
I hope you enjoy making this block!
Cheers
SB.
PS;
This is one of the blocks that one of the ladies, Kristy R, from our Rainbows Facebook page made… I LOVE it!
Thank you Kristy for letting me put up a picture of your creation.







Nice block Sally, I haven’t seen one like that before. I’m sure Amy would lend you her kids if you needed a hand with randomising your stash!
LOL, kids on there way
Hi Amy, I wanted to give them a special plug as they were in my mind as I was making the block … thinking how great it would look made all random!
😀
SB
hah Yes Sue, Amy has offered!!
Cheers
SB
Hi Sally mine is all cut out ut with power I can’t sew it together & it don’t something I can do by hand. 😦
I want without power
Nice work Sal. Can’t wait to see what you come up with next month.
Very cute block. Love it. Just for clarification–since each “leg” of the star requires 9 strips (1.5 x 5 inches each), wouldn’t that be 36 strips (rather than the 32 you list) if you are making it with scraps?
Thank you for your comment. To be honest I will have to have a reread of the block! it has been a while!
Cheers
SB
I just went through – and yes you are right! have made the change… and on the most simple of math problems!! Thanks Mimi!
Cheers
SB